Activities to Help Students Visualize Literature
Sharing is caring!
Teaching students to visualize while they read is an essential skill in becoming an active reader because it enables them to make inferences while they read, recall and summarize the text, and make a deeper connection to the text by visually demonstrating their unique interpretation of it.
While some students love the opportunity to get artsy in English class, others may not feel confident in their artistic abilities, so it is important to preface visualization activities to your students with the disclaimer that while effort and neatness are expected, overall you are looking for comprehension not artistic skill.
Here are ten activities to help students visualize literature:
The Classic
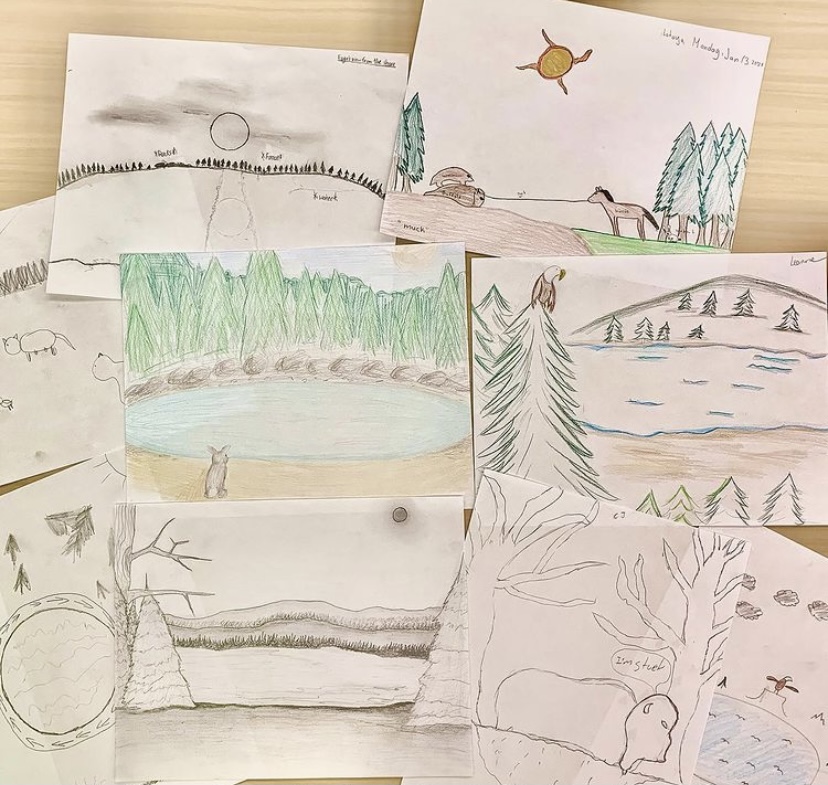
A tried and true method of visualization is a simple pencil and paper drawing. Add some pencil crayon if you’re feeling fancy. The idea is to instruct your students to draw what they visualize while you read, and then their drawings can be compared in a discussion about how we all interpret literature differently and bring our own understandings to it. For this reason, it is easiest to only ask them to draw a particular passage or scene – asking them to draw what they visualize for an entire chapter or short story may end up looking chaotic.
The example to the right displays visualization drawings my students created for a scene from the Richard Wagamese short story, The Animal People Choose a Leader.
Chalk Drawings
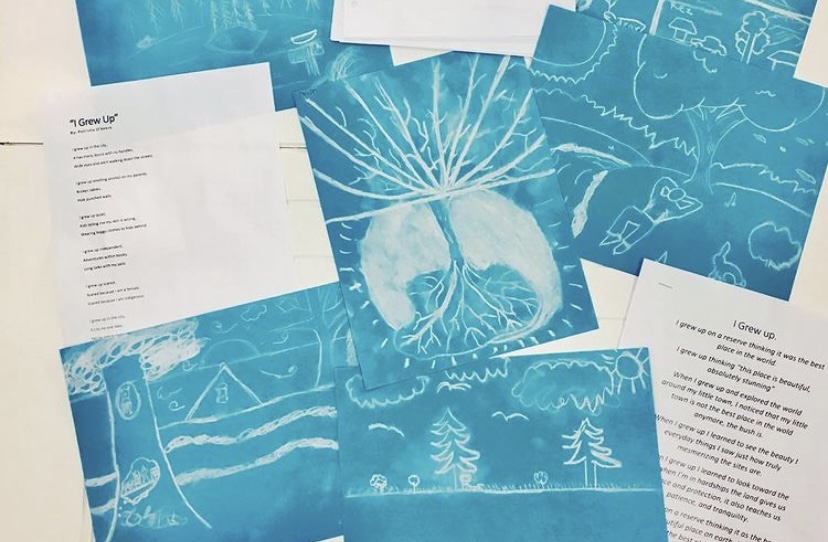
Provide each student with one piece of chalk and one piece of construction paper. While reading aloud, instruct students to draw whatever images come to mind with their chalk on the construction paper. The texture of chalk on construction paper provides a different tangible experience that students will enjoy. Poems or short passages from a novel or short story lend themselves well as the focus of this activity. After, students can share in a gallery walk to discuss which details they visualized and found significant.
The example to the left shows chalk drawings my students visualized for Lenore Keeshig Tobias’s poem I Grew Up.
Mind-Map Doodle
Provide students with a piece of blank paper and a marker. Read a text aloud and ask students to only listen (not read). While they listen, they will doodle a mind map of words and symbols that they feel represent the important information in the reading, and how this information inteconnects. Students can create any kind of mind map/doodle they want, as long as it makes sense to them. After the first read through, students will read again on their own and fill in any missing details.
Digital Option: Students can create their mind map on a Google Slide or Jamboard.
Picture This!
Provide students with a picture of a scene that relates to a text being studied. This should be a scene that depicts a setting from the text, like a character’s bedroom for example. Instruct students to add to the picture by drawing details that relate to that character or scene.
Digital Option: Provide students with a scene on a Google Slide and instruct them to add details to the scene from the text by copying and pasting images onto the slide.
Tone & Mood Painting
To teach about tone and mood in literature, provide students with a blank piece of paper (or canvas if you’re able), and a pallet of various paint colours (this can be a paper plate). While reading a passage from a text, ask students to paint how it makes them feel. Instruct students to focus on colours and brush strokes, not on painting an actual image. The end result will look very abstract but will convey the mood of the text.
Digital option: An alternate method of completing this activity would be to use the app Procreate if your school has access to it.
Passing Notes in Class
While reading a text aloud, circulate a sheet of paper around the class, or amongst smaller groups, and ask each person to add a new detail to the drawing. These could be setting details of a particular scene or character description details. When finished, discuss the drawing and how we all visualize differently and interpret meaning in different ways.
Digital Option: Students work on a collaborative Google Slide to copy and paste images into a scene or an outline of a character.
Character Sketch
Students choose a character from a text and draw that they visualize the character to look like – attention to detail is a must (No stick people!). Instruct students to include written elements to their sketch as well by adding direct quotes from this character that reveal their character traits.
Graphic Content
Students can demonstrate their understanding of a particular scene in a text by turning it into a graphic text (basically created like a graphic novel, but only a page or two long). You can provide your students with a template, but it is likely easier for them to create their own after viewing some examples of the genre. You may need to conduct a mini lesson on the parts of a graphic novel (panels, gutters, captions, speech bubbles, etc.).
Digital option: There are many online options that students can access for free by searching for “online comic creator,” or “graphic novel creator.” If they are not able to save their final product without creating an account, they can take a screenshot and send it that way.
Quotation Poster
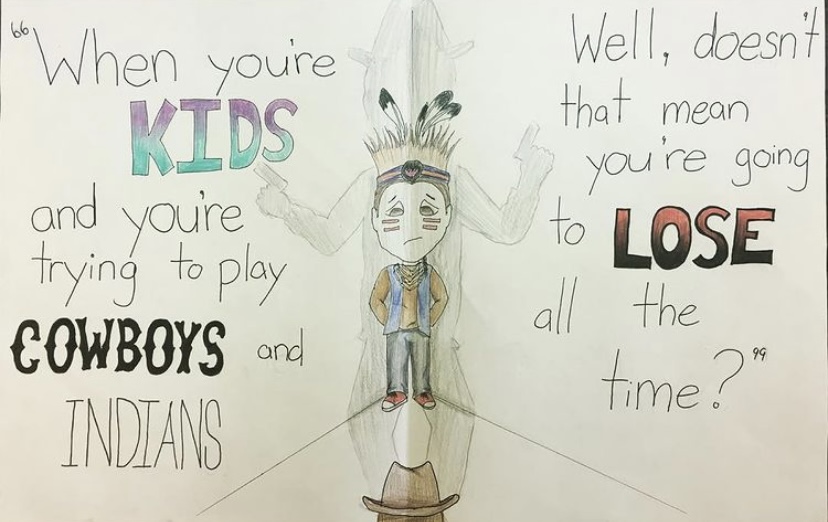
After reading or viewing a text, ask students to choose a significant quotation (or provide them with options to choose from). Students then create a poster that incorporates the quotation and a drawing of what the quote means to them (their interpretation).
The example to the right is a quotation poster a student created for the film Reel Injun.
Bring a Character to Life
Engage students in a novel study by adding details to a life-size character cutout after reading each day. Use a roll of craft paper, trace the outline of a body, and cut it out. You can assign different groups to be responsible for adding a detail to the cutout each day, or it can be a whole class discussion and creation. You can draw directly onto the cutout or cut and paste other objects to it.
Digital option: Create your character cutout on a collaborative Google Slide that students can add text boxes and images to.
Leave a Reply Cancel reply
© Mochas and markbooks 2025 | Template by Waymaker Designs |
Hi would you mind sharing which blog platform you’re using?
I’m going to start my own blog soon but I’m having a difficult time making
a decision between BlogEngine/Wordpress/B2evolution and Drupal.
The reason I ask is because your layout seems different then most blogs and I’m looking for something unique.
P.S My apologies for being off-topic but I had to ask!
Hi! No worries, I use a template from Showit.
Thanks for your blog, nice to read. Do not stop.
Thank you!